Christmas Crunch

IMG_1136_Fotor

IMG_1144_Fotor

Merry Christmas! We hope everyone is having a relaxing holiday full of love and laughter with everyone you love. Christmas can be a busy day and this easy, delicious snack is perfect for afternoons sitting by the fire playing board games. Still need a last minute gift? As we’ve mentioned in other posts, it is so easy to wrap up some Candy Cane Cookies or Rocky Road Fudge in cute holiday packaging and call it a day!This Christmas Crunch is another perfect gift, especially last minute. It doesn’t require many ingredients, and is so easy and quick to make. Let the kids help with this one- it is so simple! Wrap it in a box with a festive holiday bow and your friends and family will love it. It makes for a thoughtful, homemade, and delicious gift!

Ingredients:

  • 3 cups Cheerios
  • 3 cups Rice Chex
  • 3 cups Wheat Chex
  • 2 cups pretzel sticks
  • 24 oz (2 bags) white chocolate chips
  • 24 oz (2 bags) Milk Chocolate M&M’s

Directions:

Mixing all of these ingredients requires a very large bowl. I didn’t have a bowl large enough so I ended up mixing it in a large stock pot.  Also, as you can see, I used holiday M&M’s to make it more festive, but you can also use regular ones. Tip: Make it again and change the color based on the season for a year-round gift!

First, combine the cereals, pretzel sticks and M&Ms into the extra-large bowl (or pot). Mix with a large wooden spoon or your clean hands.

IMG_1073_Fotor

IMG_1076_Fotor

Next, melt the white chocolate in the microwave. Pour the white chocolate chips into a large bowl and microwave for 30 seconds. Take the bowl out, stir the white chocolate chips and continue to microwave again for 15-30 seconds at a time, stirring after each time until the chocolate is melted. Be careful not to over-melt. Towards the end, I take it out and stir about every 10 seconds just to be safe. It is important to stir the chocolate in-between microwaving times. The whole process takes about 1.5-2 minutes. Check out this video about melting chocolate in the microwave, in case you have never done this before and need a little more guidance.

Once melted, drizzle the white chocolate over the dry mixture, a little at a time. Mix with your hands or a wooden spoon until all the chocolate is evenly coating the cereal mixture.

IMG_1118_Fotor

Lay out a large sheet of parchment paper on a flat surface. Spread the mixture with the chocolate on it over the paper. Let sit for 30 minutes-1 hour until chocolate has hardened. Freeze or refrigerate until ready to serve. Enjoy!

IMG_1136_Fotor

IMG_1144_Fotor

IMG_1150_Fotor

Sugar Cookie Wonderland

IMG_5054

We can’t believe Christmas is less than a week away! The time always goes so fast. We’re trying to really savor all of our favorite Christmas time traditions. Baking has always been huge for us around the holidays, as we have mentioned before. Our biggest baking tradition is making and decorating sugar cookies; we look forward to it all year! We like to give these cookies as gifts; Jess brought a big box to work at the hospital this year. We grew up making sugar cookies with eggs and milk, but when Jess went vegan we spent some time perfecting this vegan version. Everyone is always shocked when we tell them they are vegan!

IMG_5017

These cookies can also be cut into different shapes for any holiday (hearts for Valentine’s day, flags for 4th of July, menorahs and dreidels for Hanukkah). If you don’t have any cookie cutters on hand use a drinking glass to cut circles and decorate them as snowmen faces or ornaments. Or, use a shot glass to form smaller circles and meld them together before baking for a whole snowman, as shown below.

IMG_5042


Ingredients:

Dough

  • 1 1/2 cups powdered sugar
  • 1 cup softened Earth Balance
  • 1/4 cup almond milk
  • 1 1/2 teaspoon vanilla extract
  • 2 1/2 cups flour
  • 2 tablespoons cornstarch
  • 1 teaspoon baking soda
  • 1 teaspoon cream of tartar

Icing

  • 2 tbsp softened Earth Balance
  • 2 cups sifted powdered sugar
  • 1 teaspoon vanilla
  • 1 tablespoon almond milk
  • food coloring, sprinkles

In a large bowl, beat together 1 1/2 cups powdered sugar, 1 cup softened Earth Balance, 1/4 cup almond milk, and 1 1/2 teaspoons vanilla extract. This is best done with an electric mixer or hand mixer. Stir in 2 1/2 cups flour, 2 tablespoons corn starch, 1 teaspoon baking soda and 1 teaspoon cream or tartar. Cover and refrigerate for at least 30 minutes (this dough will keep for weeks in the fridge).

IMG_5033.jpg

Preheat oven to 375. Remove half the dough from the fridge (the dough needs to be cold while rolling or it becomes too soft to handle) and place on a well floured surface. Roll the dough with a rolling pin (fairly thin) and cut into desired shapes. Place on a parchment paper-lined cookie sheet.

IMG_4987.jpg

IMG_4992

The cookies hardly spread so they can be placed close together. Bake for 7-8 minutes or until the edges begin to turn golden brown.

IMG_4996

Repeat with remaining dough. Allow cookies to cool on a cooling rack before icing.

To make the icing, combine all ingredients and mix with an electric mixer or hand mixer. Divide into bowls to make separate colors with food coloring.

IMG_5005
Now comes the fun part-decorating! You can spread the icing on the cookies or pipe it on. If you don’t have a piping set fill ziploc bags with icing and cut a small corner off. Have fun!

IMG_5011.jpg

IMG_5057
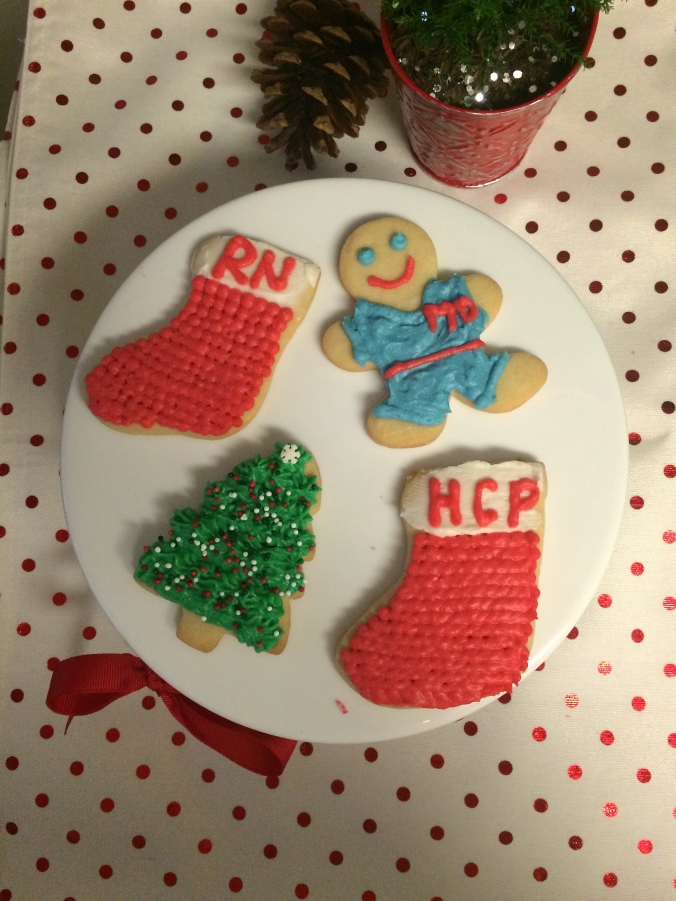
Jess’s hospital cookies, complete with a sweet doctor! Find a cute cake stand to display your cookies
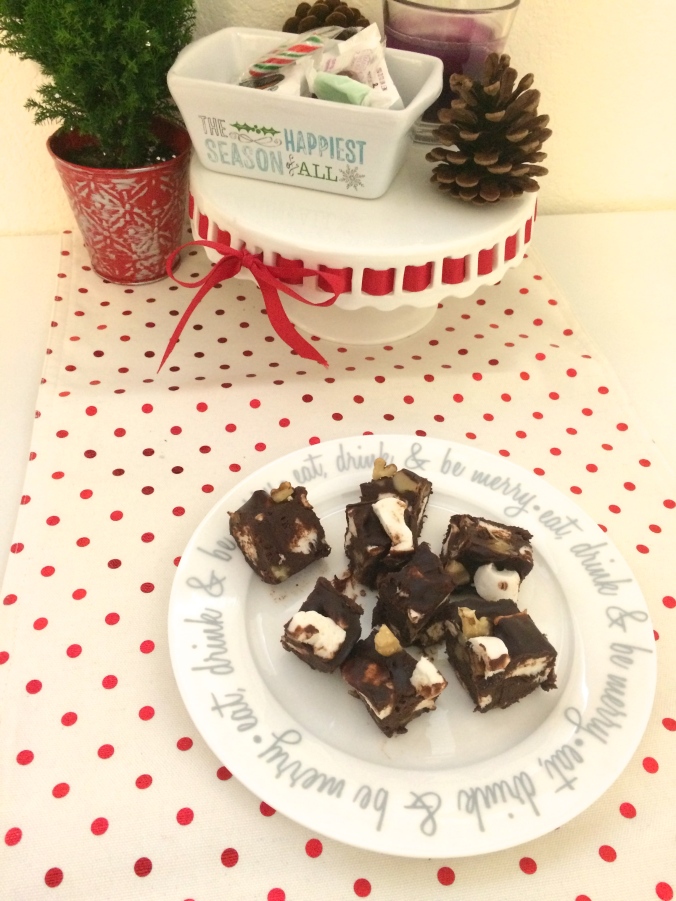
 here!

Check out our other holiday treats: Snickerdoodles, Rocky Road Fudge, Candy Cane Cookie Sandwiches

Rocky Road Fudge

IMG_4966.jpg

Our favorite time of year is well underway-baking season! Christmas time growing up was all about baking as many cookies and treats as possible. Most were made to give away as gifts but we definitely kept and snuck our fair share! So far this year we’ve made yummy chocolate peppermint cookies, Snickerdoodles, one of our favorite Christmas classics Candy Cane Cookie Sandwiches, and we’re planning a big sugar cookie bake this weekend (recipe to follow)! Today I made a new favorite I came up with last year-Rocky Road Fudge. We made fudge a lot growing up but I hadn’t made it since going vegan. I went with a coconut cream base and added in marshmallows and walnuts. Yum! This recipe was such a hit I ended up making it several times last year. It was a great treat to serve at our New Year’s Eve celebration. This recipe is vegan, omnivore tested, approved and loved! Best of all it is so easy! Just leave enough time to let the fudge set in the fridge.


Rocky Road Fudge
(VEGAN)

For those of you new to the vegan game, there are two major brands of vegan marshmallows: Sweet & Sara, and my personal favorite, Dandies. You can find these online from various sellers or sometimes Whole Foods and other specialty stores.

Ingredients

  • 2/3 cup full fat canned coconut milk or coconut cream
  • 2 tablespoons coconut oil (not melted)
  • 12 oz semi sweet chocolate chips (make sure you check the ingredients, sometimes they sneak milk in there)
  • 1 teaspoon vanilla extract
  • 1 cup vegan marshmallows, mini or chopped regular (2/3 for the inside, 1/3 for the topping)
  • 1 cup walnut halves (2/3 for the inside, 1/3 for the topping)

IMG_4877

Line a small baking dish with parchment paper, or greased foil. If you  are using regular sized marshmallows, cut them into fourths or sixths and set aside.

IMG_4880.jpg

In a medium pot, heat the coconut milk and bring to a simmer, stirring often. Simmer for 2-3 minutes. Add 2 tablespoons coconut oil and stir until it melts.

IMG_4883.jpg

Add the chocolate chips and stir quickly with a whisk until all of the chips are melted and you have a pot of gooey yummy chocolate.

IMG_4929.jpg

IMG_4932.jpg

Remove from heat or pour into a mixing bowl if you don’t have a lot of stir room. Add 1 teaspoon vanilla extract, 2/3 cup marshmallows and 2/3 cup walnuts and stir well. Make sure the marshmallows aren’t in a huge clump when you put them in.

IMG_4935

IMG_4948

Pour the mixture into your lined baking dish. Sprinkle walnuts and marshmallows over the top, about 1/3 cup of each.

IMG_4959

IMG_4963

Place in the fridge overnight, or at least in the freezer for 30 minutes. Cut into bite sized pieces. Store in the refrigerator.

IMG_4979

IMG_4968

Apple Pie Muffins

IMG_4331

img_4348

IMG_0437

IMG_0438

IMG_0431

December is here! We are so excited to begin our favorite holiday tradition- nonstop baking! Today, we kick off baking season with these scrumptious, delectable apple pie muffins. As usual, we’ve included two recipes, one vegan and one non vegan recipe. These were a HUGE hit with everyone who tried them- definitely give them a try, they are irrestiable! Wrap them up in cute holiday packaging and give them away as an easy and affordable gift. Check back later this week for more baking recipes! Enjoy.

Click the link below to see how to make these delicious muffins, step-by-step.

Continue reading

Chilly Weather/Chili Weather


IMG_0617_Fotor

IMG_0639_Fotor

IMG_4850

Today we’re sharing the perfect meal for blustery winter nights- chili! Hopefully by now you have cleared out the Thanksgiving leftovers and are ready to take on the next rush of holidays! Winter nights mean cooler temperatures and less time for dinner prep! I don’t know about you, but we definitely don’t feel like coming home after a long day of holiday shopping and trimming the tree to prep a super-involved dinner! Chili is one of our favorite go-to easy and hearty meals. Today Nikki shows you how to make a tomatillo and white bean chicken chili while Jess shares a classic vegan chili recipe full of protein and veggies.

IMG_4787

Follow along as we show you, step-by-step, how to make a simple and substantial winter-time meal. Click the link below to see the recipes!

Continue reading